1. Home screen
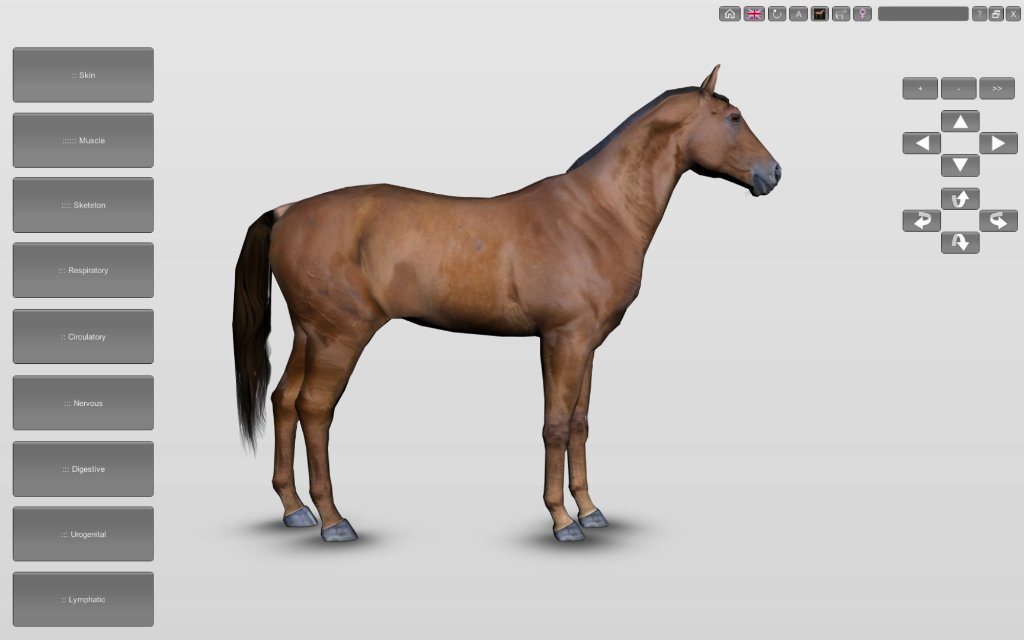
Whenever you open the program, the initial screen will display the whole animal, with all systems visible. The buttons on the left allow you to control which systems you wish to view and which should be hidden. Note that the systems have more than one layer. One click and the most superficial layer becomes semi-transparent; another click and it is completely hidden. This allows you to view deeper layers.
2. Control panel
The buttons on the right side of the screen allow you to perform a number of functions. Here’s how each of them works:

Home (reset)
This button makes the model go back to the initial settings, as it is presented at the time the software is opened.

Language selection
Available options depend on the software.

Background color / Anatomical planes
Switches the background color from light to dark, making it easier to see structures such as bones and ligaments. Take one more click and view the anatomical planes.

Remove all structures
The first click makes all structures (except those previously selected) semi-transparent, the second click removes all structures.

Female / Male
This button lets you switch between the female and male reproductive system.

Image quality
The control of image resolution allows the software to run smoothly on slower computers. This button has three phases: A (auto), q (lower resolution), Q (higher resolution).

Auto rotation
Available in two speeds, allowing a more dynamic visualization of the model.

Search box
Enter the first few letters of a structure name to perform a search through all structures contained in the software.

Questions
This button allows access to this tutorial and gives more information about the software.

Window / Full Screen
Select how you prefer the software to appear on your computer screen.

Close
This button closes the program.

Zoom control
Controls the size of the image on the screen. You can also use the “+” and “-” keys or the mouse wheel.

Hide control panel
Make room for a better view of the model on the screen.

Move
Move the model to the sides, up and down. You can also use the arrow keys on your keyboard or the mouse (click on the screen around the model and drag).

Rotate
Rotates de model. You can also use the mouse: click on any structure of the model and drag.
3. Captions
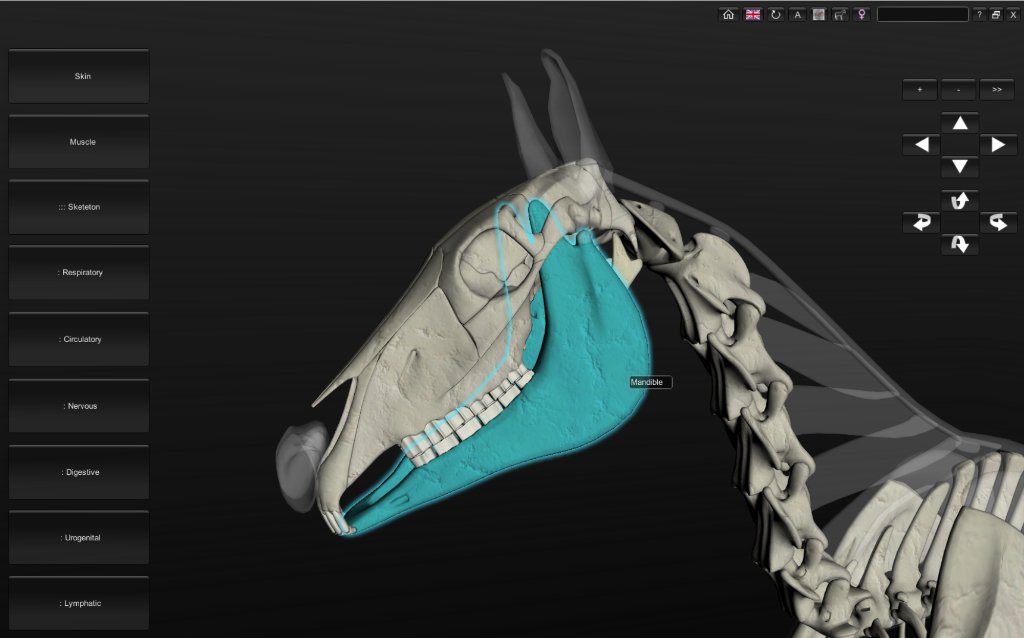
Hovering the mouse over any structure will highlighted it (blue) and display a caption in your chosen language. Left-click on the structure with the mouse and the caption will remain visible. Click again to hide it.
Note: Two quick clicks on a structure will center it on the screen.
4. Selecting and removing structures
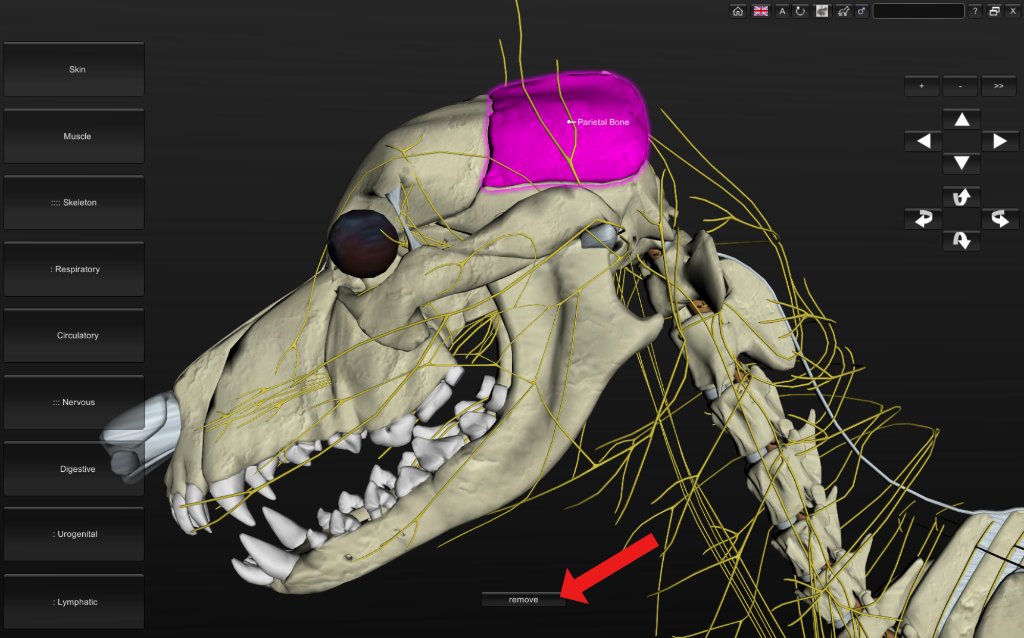
To select one or more structures, simply right-click on it with your mouse. It will be highlighted (pink) and its caption will continue to appear even after removing the mouse pointer.
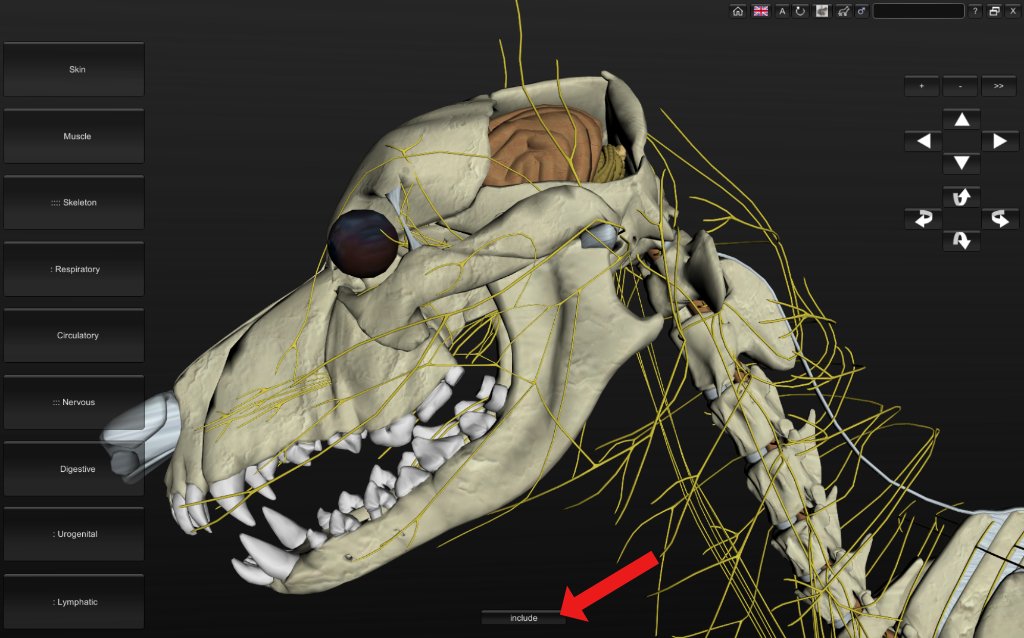
Selected structures can be hidden by clicking the remove button. In this way, organs that are located deeper can be better visualized.
To once again display a hidden structure, just click the include button.
5. Displaying a single system
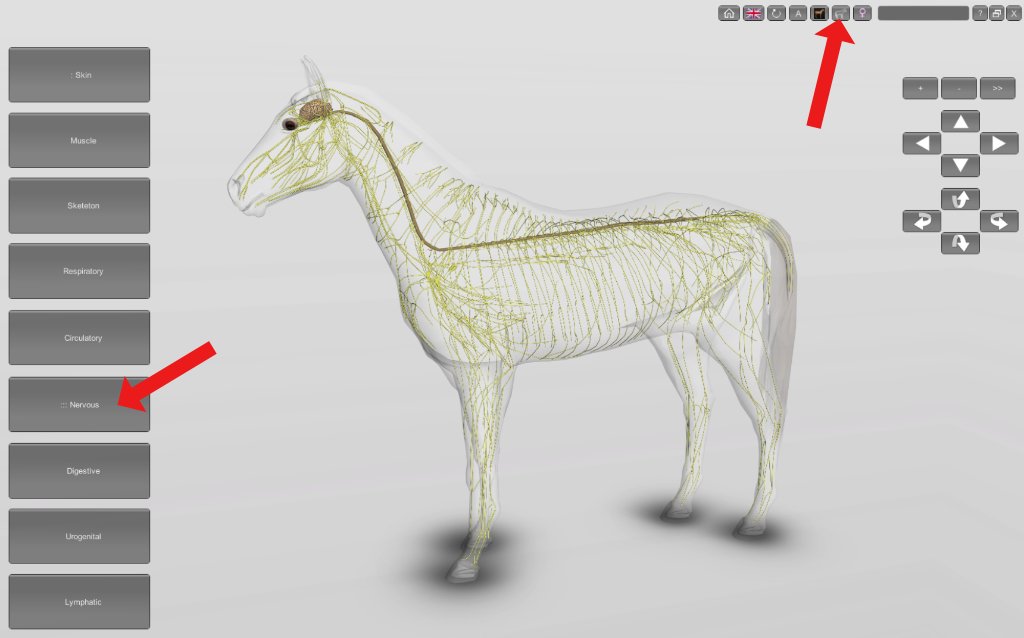
Sometimes we will want only one system to be displayed on the screen. The easiest way to do this is clicking the transparency button until all systems are hidden. Then select the system that you wish to be displayed by clicking on the corresponding button (left panel). In the example below, the horse nervous system was selected.
6. Touchscreen
If you are using the software on a touch screen, some functions can be triggered with specific commands:

Drag one finger
Shows structures’ captions

Two quick taps with one finger
Centralizes a structure

Drag two fingers
Rotates the model

Drag three fingers
Move the model

Pinch
Zoom control
